Integrate Ubuntu 14.04 (Trusty Tahr) to Zentyal PDC (Primary Domain Controller) – Part 7
By Matei Cezar Under: Zentyal On: April 23, 2014
From my previous post about integrating Ubuntu 13.10 to Zentyal PDC Active Directory things have changed for some software packages once the release of Ubuntu 14.04, codename Trusty Tahr, and seems like Ubuntu developers had dropped support for “likewise-open” package which did an excellent job of integrating Ubuntu to Windows Active Directory in just a few moves and clicks.
On Ubuntu Launchpad.net the page for likewise-open package displays a warning message saying that there are no source release for the package in Trusty Tahr. So, trying a classic installation from CLI with apt-get install command.

But don’t worry, even if ‘Trusty Tahr‘ has dropped support for ‘likewise‘ packages ( let’s hope that maybe just for a short period ) we can still use the ‘Saucy Salamander‘ repositories, download and manually install the packages needed to join Ubuntu 14.04 on PDC Active Directory.
Step 1: Downloading Dependency Packages
1. For manually downloading the packages go to official ‘Ubuntu 13.10‘ packages page, select your location and download the following packages.

2. After downloading packages, install the packages using a GUI installer like ‘Gdebi‘ or install it from command line. You can also download and install the packages from command line only by opening a Terminal and issue the following commands in this order.
$ wget http://de.archive.ubuntu.com/ubuntu/pool/main/l/likewise-open/likewise-open_6.1.0.406-0ubuntu10_amd64.deb
$ wget http://de.archive.ubuntu.com/ubuntu/pool/main/libg/libglade2/libglade2-0_2.6.4-1ubuntu3_amd64.deb
$ wget http://de.archive.ubuntu.com/ubuntu/pool/universe/l/likewise-open/likewise-open-gui_6.1.0.406-0ubuntu10_amd64.deb
$ sudo dpkg -i likewise-open_6.1.0.406-0ubuntu10_amd64.deb
$ sudo dpkg -i libglade2-0_2.6.4-1ubuntu3_amd64.deb
$ sudo dpkg -i likewise-open-gui_6.1.0.406-0ubuntu10_amd64.deb
That’s all for downloading and installing ‘likewise-open‘ packages needed for joining ‘Ubuntu 14.04‘ to Active Directory. Also you can backup all of this three packages for a later reuse.
Step 2: Integrating Ubuntu 14.04 to Zentyal PDC
The procedure for joining ‘Ubuntu 14.04‘ with ‘likewise‘ is the same as for all Ubuntu predecessors as in this post Integrate Ubuntu in Zentyal PDC.
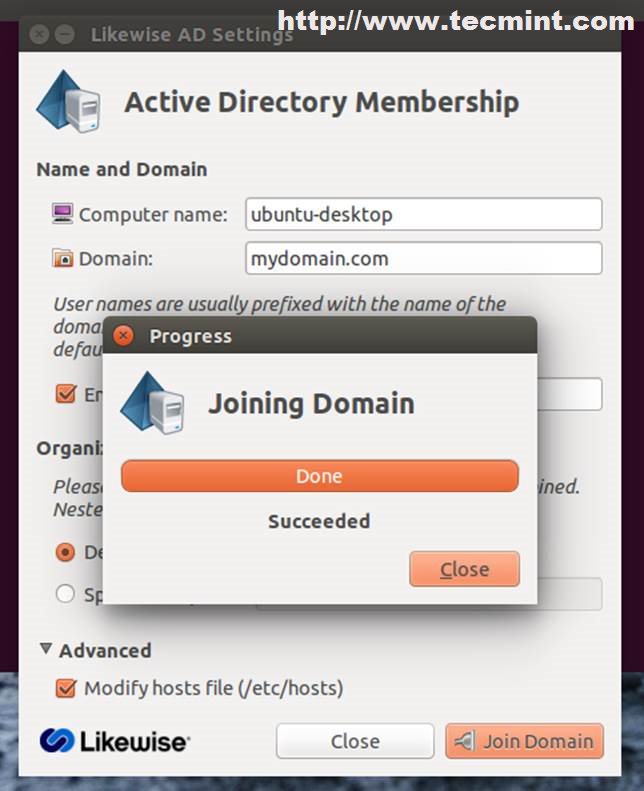
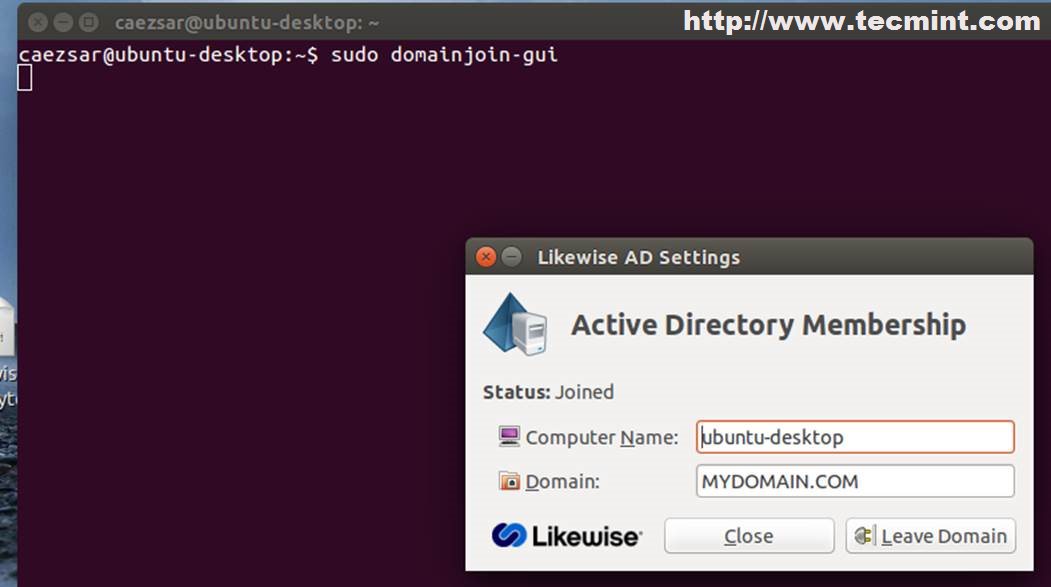
3. If you prefer using a GUI, issue the following command in Terminal, enter your settings and PDC administrator credentials.
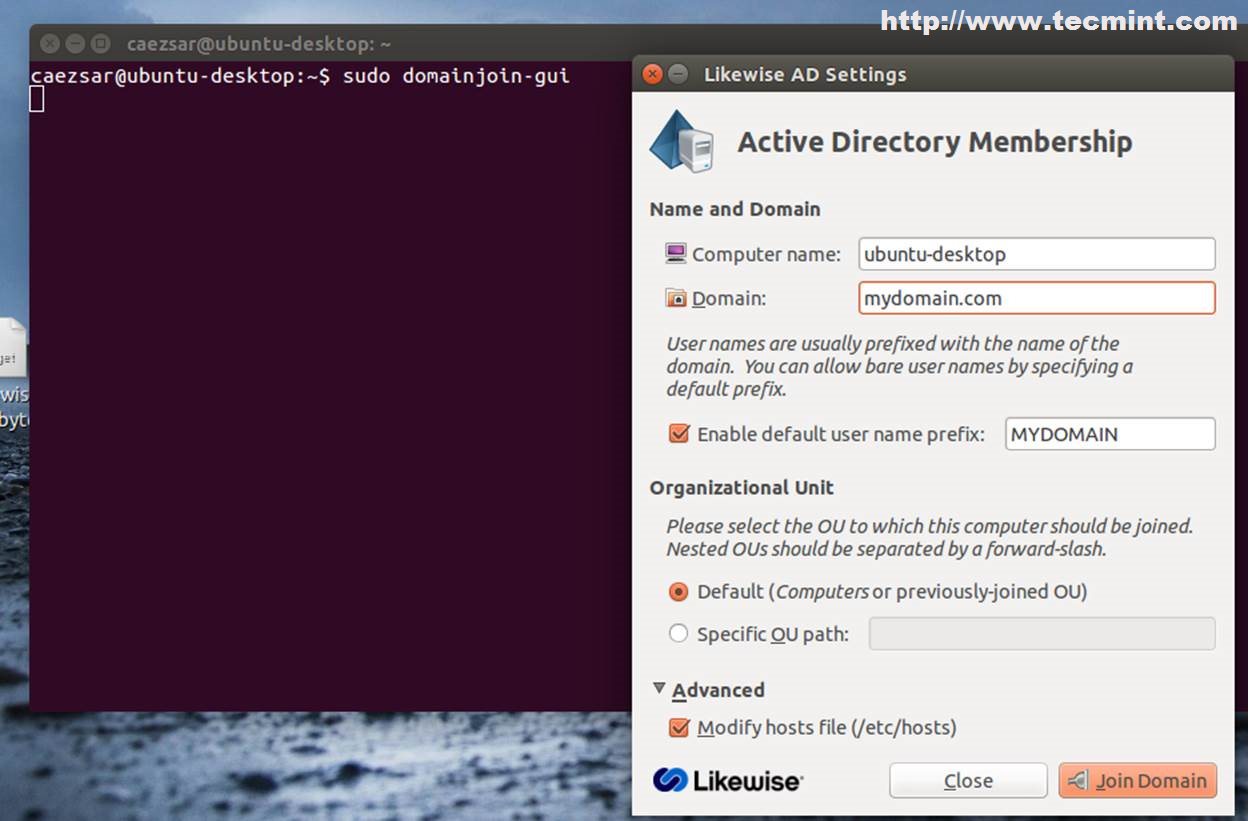

If your network settings are correct and DNS entry points to ‘Zentyal PDC‘ at the end you should get a successfully confirmation message.
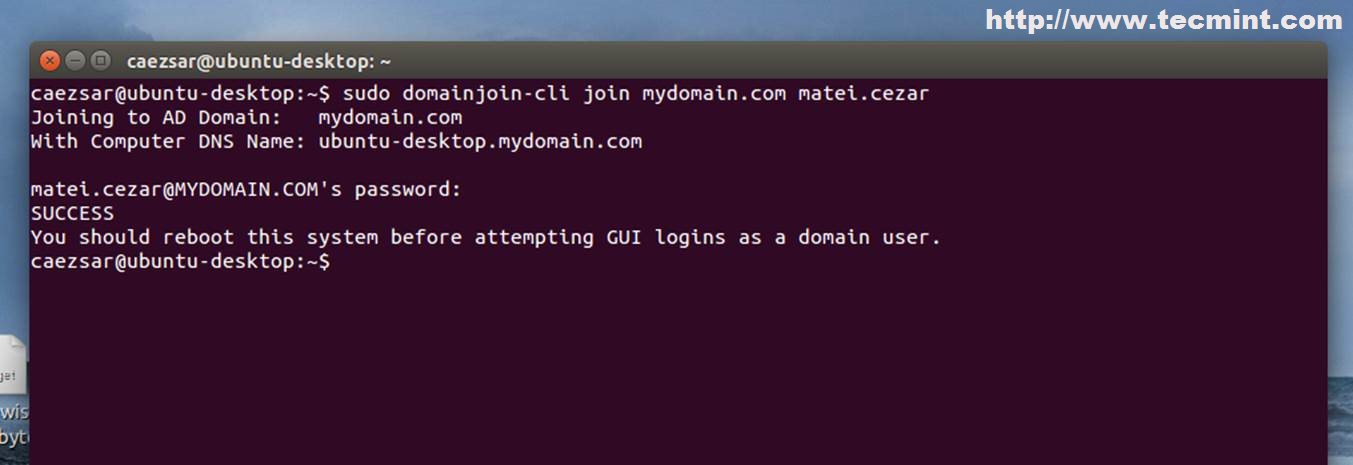
4. If you prefer command line, issue the following command to integrate ‘Ubuntu 14.04′ to Active Directory.
$ sudo domainjoin-cli join domain.tld domain_administrator
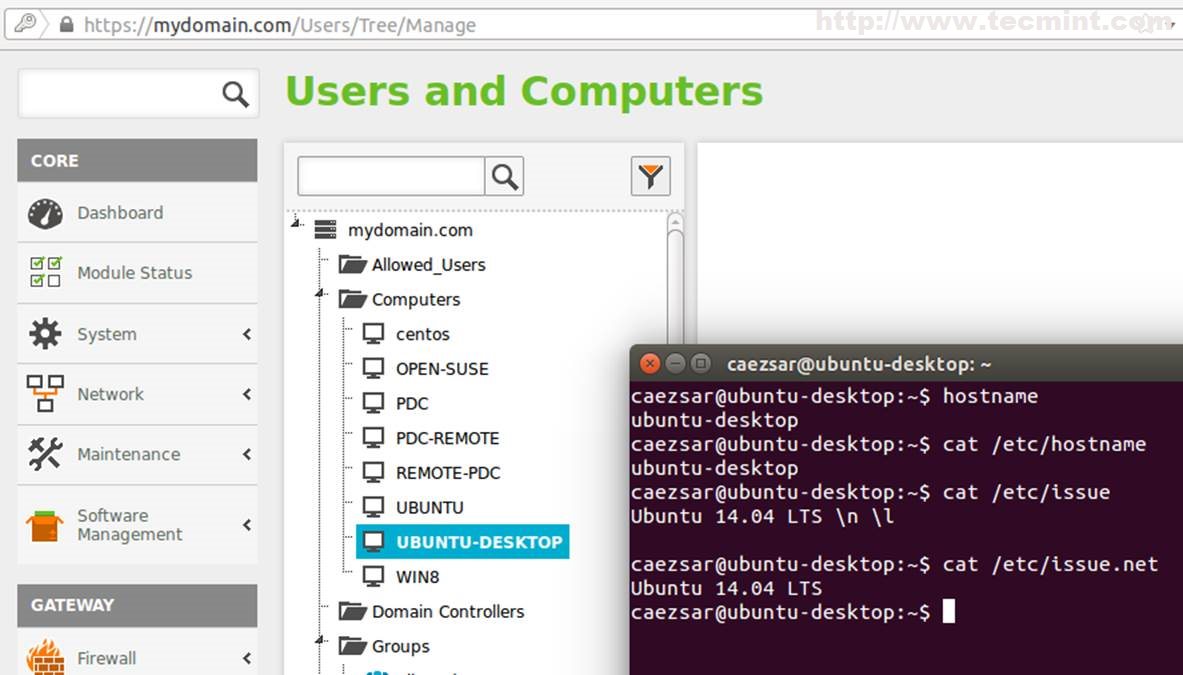
5. After joining Ubuntu 14.04 successfully, reboot your system. Next, open a browser and navigate to ‘Zentyal Web Interface‘ and verify if ‘Ubuntu 14.04‘ hostname appears in Users and Computers module.
You can see your ‘Zentyal PDC Server‘ status by running the following command.
$ lw-get-status

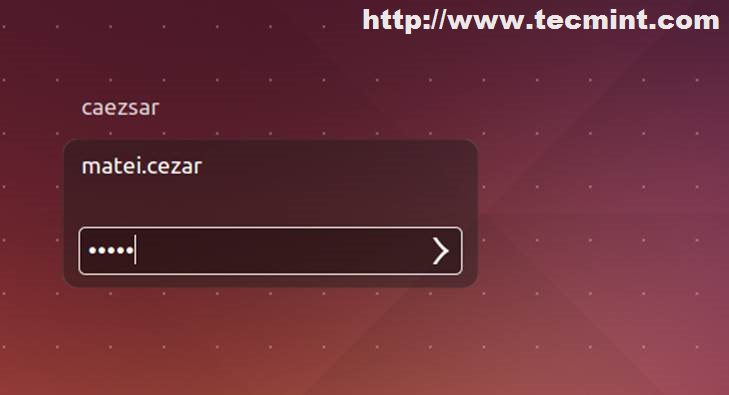
Step 3: Login with Domain Credentials
Ubuntu 14.04 accepts only internal system users on Logon screen and doesn’t provide the ability to manual login a user from Active Directory.
6. To actually perform a GUI Logon on Ubuntu 14.04 with an Active Directory User edit ‘50-ubuntu.conf‘ file located in ‘/usr/share/lightdm.conf.d/‘ path and add the following lines then reboot to apply changes.
allow-guest=false        ## If you want to disable Guest login
greeter-show-manual-login=true  ## Enables manual login field
7. After reboot on Logon screen select Login and provide your Active Directory Usercredentials with related to syntax.
domain_name\domain_user
domain_name.tld\domain_user
domain_user
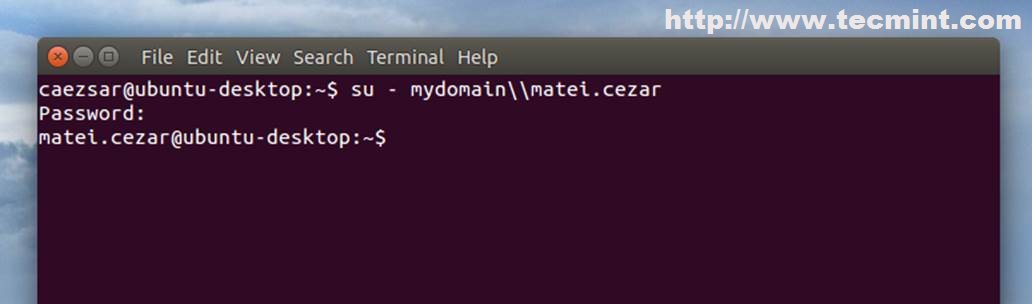
8. To perform a CLI login from Terminal use the following syntax.
$ su - domain_name\\domain_user
$ su - domain_user
As you can see the Active Directory User has home Path, UID and group appearance different from internal Ubuntu users.

Step 4: Enable Active Directory Administrative Rights
Remote users from Active Directory have the same Standard status as internal Ubuntu users and are not allowed to perform administrative tasks on system.
9. To grant root privileges to an Active Directory Administrative User, issue the following command with root privileges.
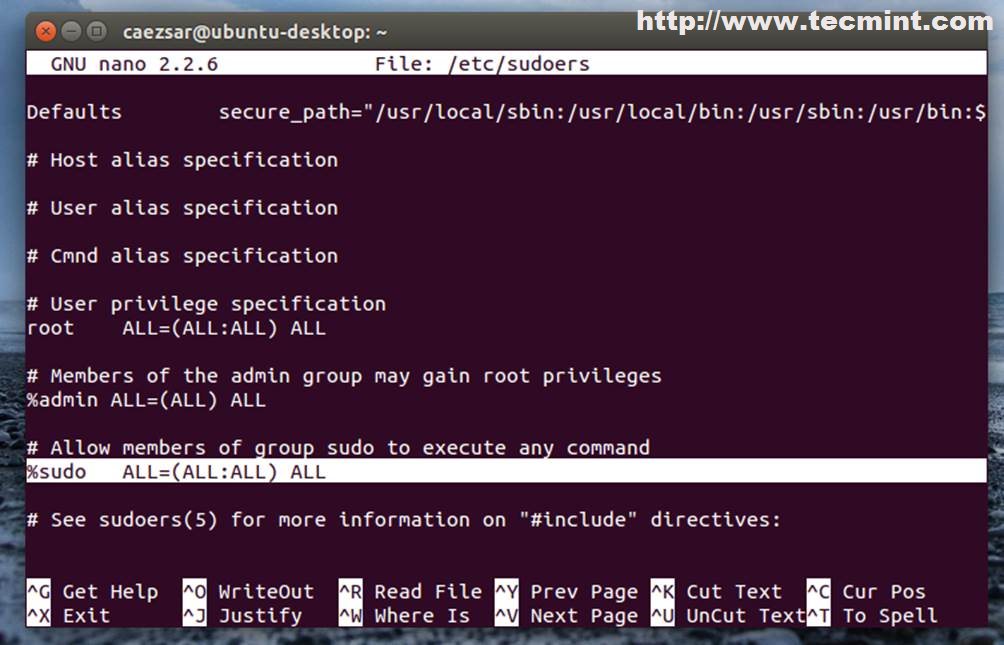
$ sudo usermod -a -G sudo AD_administrative_user
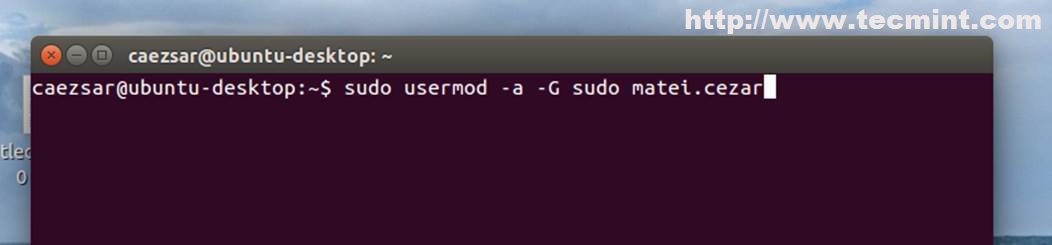
Basically the above command, adds the Active Directory Administrative User to Ubuntu local group “sudo“, group enabled with root powers.
Step 5: Leave Domain
10. For leaving domain from GUI, open ‘Likewise‘ from command line and hit on Leave Domain.
If you prefer to do from command line, run the following command and provide AD Admin User password.
$ sudo domainjoin-cli leave domain_name

That’s all the settings needed for a basic Ubuntu 14.04 integration into a Primary Domain Controller Active Directory with the help of ‘Likewise-open‘ packages borrowed from Ubuntu 13.10 repositories.
No comments:
Post a Comment