How to Manage Zentyal PDC (Primary Domain Controller) from Windows System – Part 2
By Matei Cezar Under: Zentyal On: April 8, 2014
Download Your Free eBooks NOW - 10 Free Linux eBooks for Administrators
This tutorial will demonstrate how you can access and manage your Zentyal 3.4 Community Edition as a Primary Domain Controller from a Windows Based System using remote software on a Windows 8.1 Computer.
Zentyal 3.4 PDC (Primary Domain Controller) almost perfectly imitates a basic Windows 2003 Active Directory, that means you can setup users and groups, file sharing, add new domains or new records in your DNS server and setup Group Policy Setting for all users and computers that are actually integrated into Active Directory, making very easy for you to manage security for a large number of accounts and computers, while doing this with just one basic license for a Windows 7 or 8.1 Computer (you will never have to buy or touch a Windows 2008/2012 Server license).
Requirements:
- Previous Zentyal 3.4 installation and configuration as a PDC – Part 1, with a domain name ( in this case is a fictional one, only used on my local network for the sake of example.
- A Windows 8 computer that will be integrated in Zentyal PDC and will act as a Remote System for this domain
- Remote Server Administration Tool for Windows 8.1
- Putty Remote Client
- WinSCP Remote Client
Step 1: Integrate Windows System in “mydomain.com”
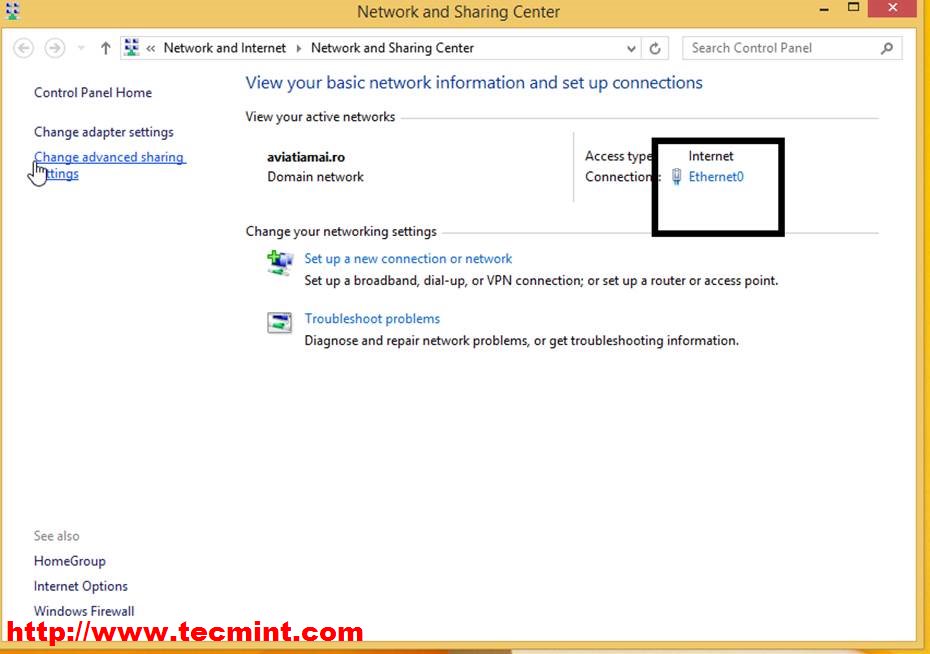
1. Logon with administrator local account and go to left side on taskbar an click right on the network icon, then Open Network and Sharing Center.

2. Click on Ethernet0.
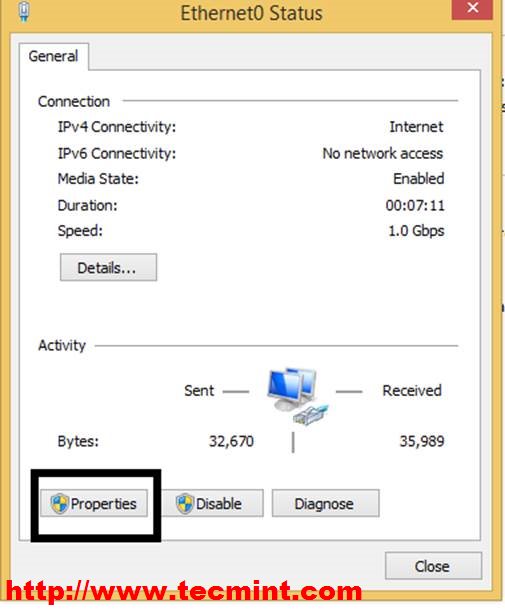
3. Go to adapter Properties.
4. Select IPv4 and the select Properties.
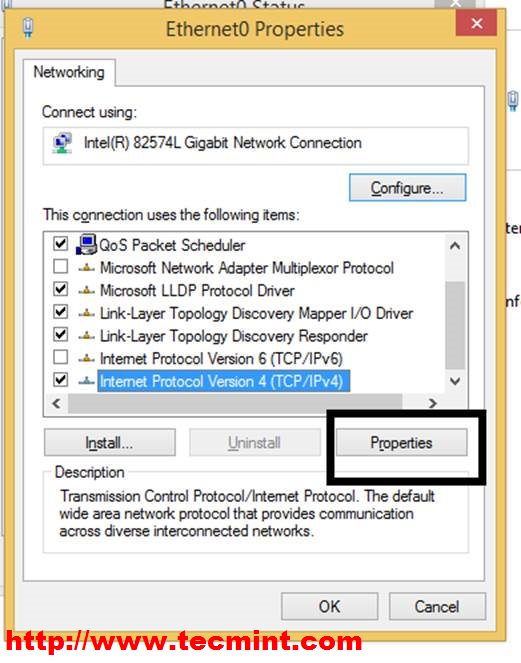
5. Setup your own network connections address, netmask, gateway and DNS ( Make sure that your first DNS here is the Zentyal PDC IP address).

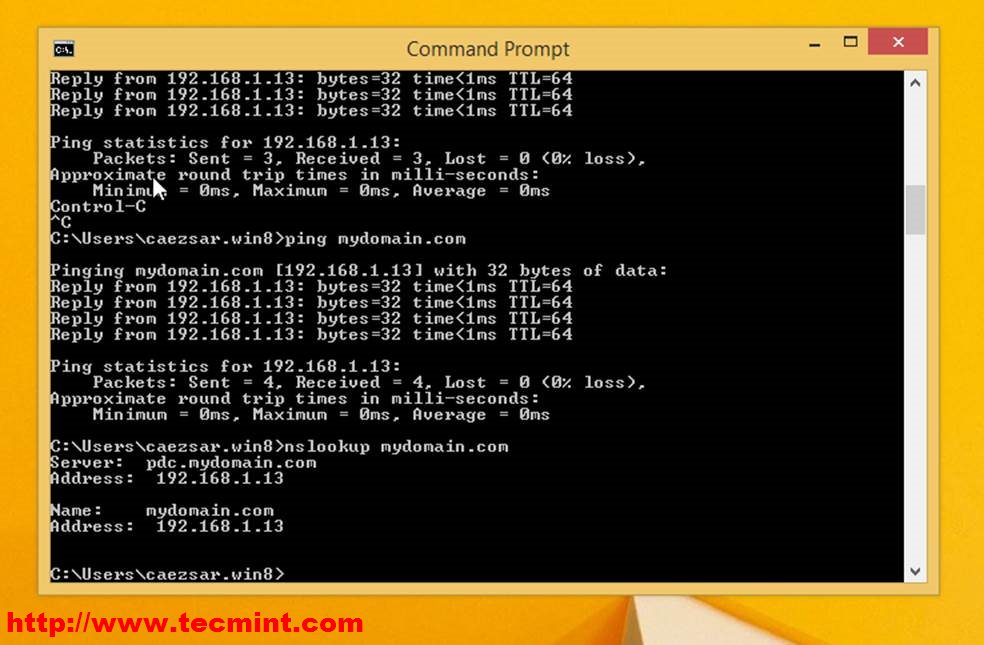
6. Click OK and the Close on all windows. Now it’s time to see if the network configurations are the correct ones and everything work fine. Right click on Start -> Command Prompt and try ping your domain.
Warn!!: If you cannot see the correct IP address of Zentyal PDC. Open a Command Prompt(Admin) and enter the following command.
ipconfig/flushdns
And then try to ping “mydomain.com“. You should also try the “nslookup” command to see domain IP address.
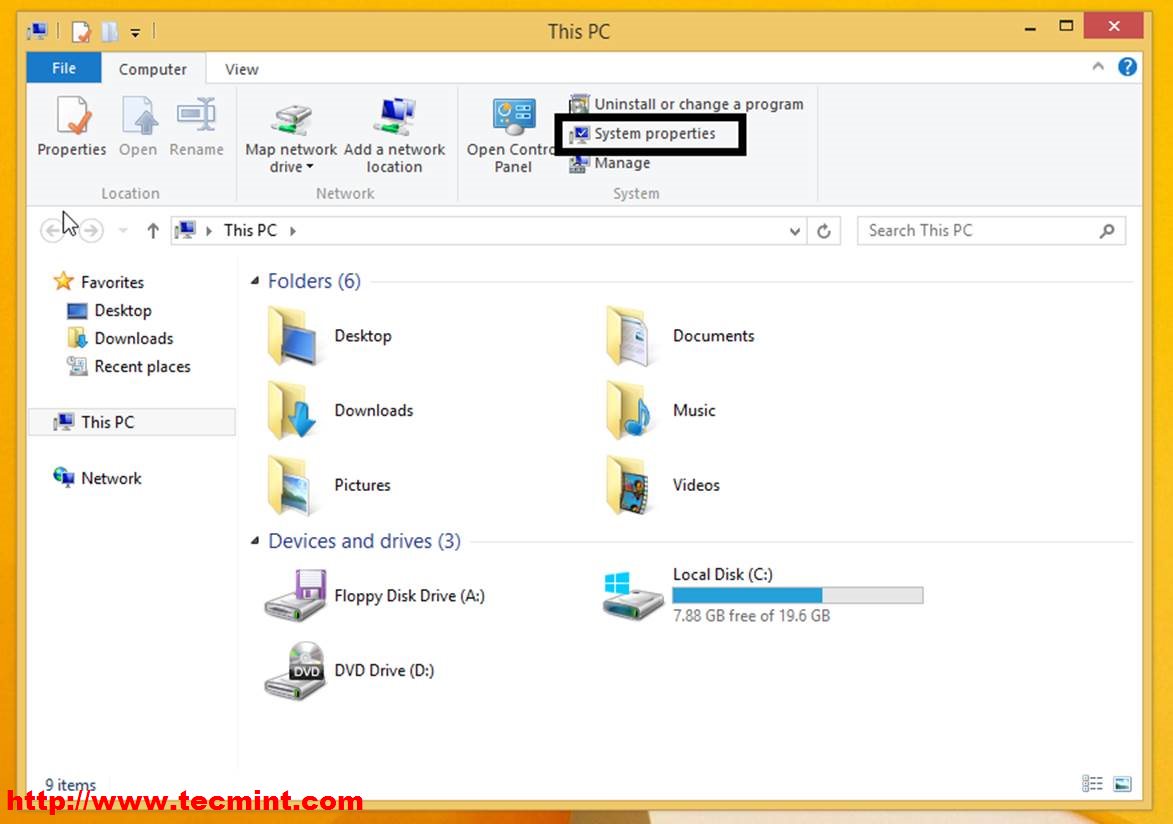
7. Now open “This PC” shortcut and go to System Properties -> Computer Name -> Change.
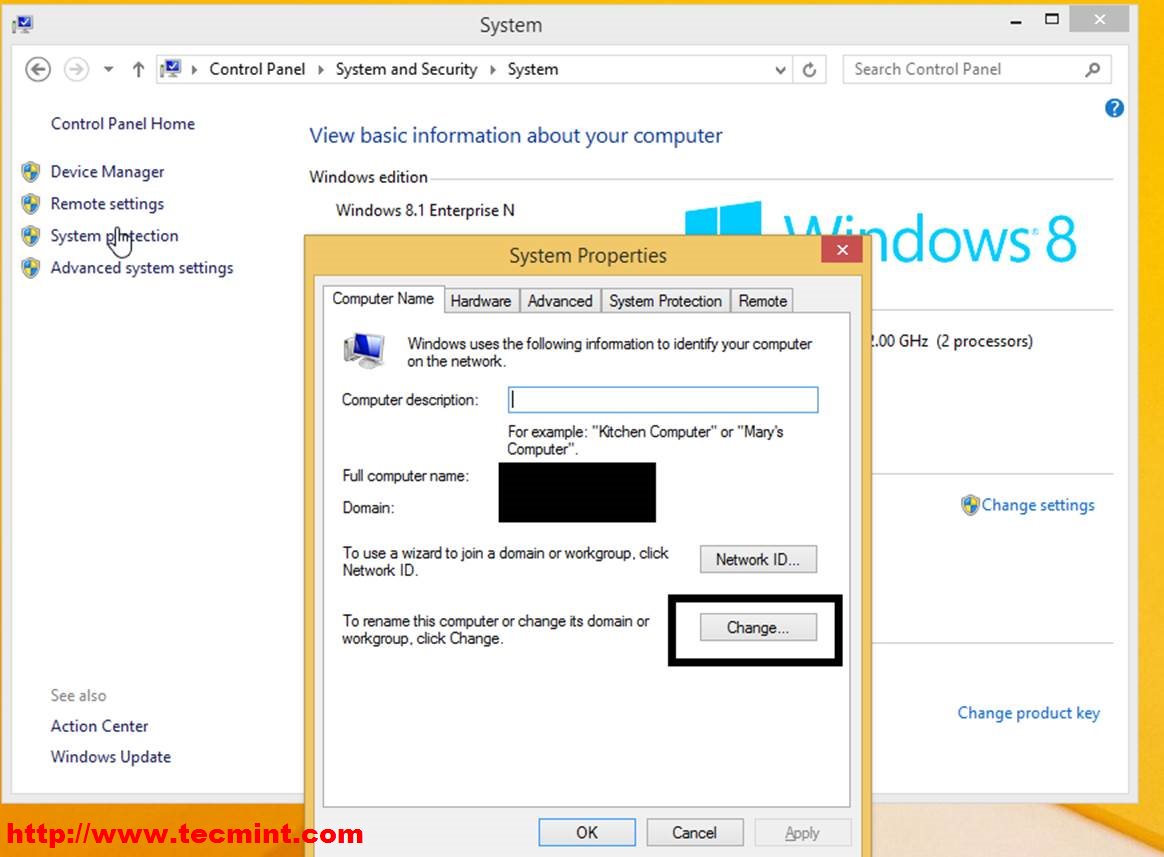
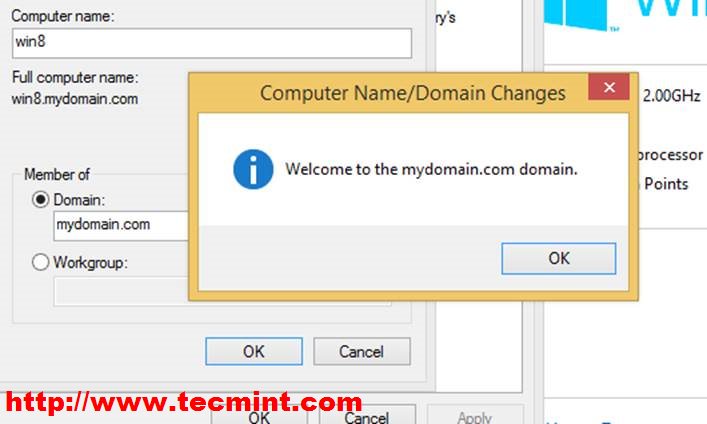
8. Enter a Computer Name ( try something more descriptive like WIN8_REMOTE_PDC) and your domain name in Member of Domain field , hit Enter, enter your Administrator username and password ( In this case on my previous tutorial I have setup on Zentyal PDC the user “matei.cezar” with administrator powers).
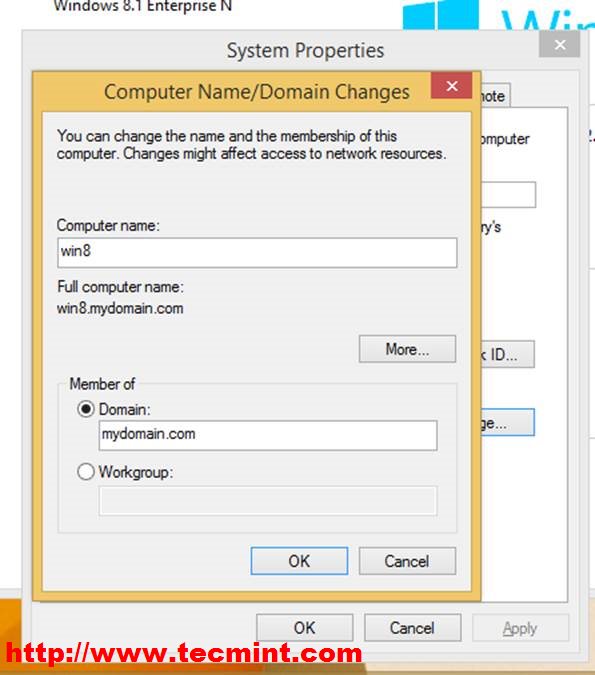
9. After your credentials are verified by Samba on Zentyal Server you will be prompted with a success notify, then reboot your system to be able to join and logon on domain.
10. After reboot on prompt enter: domain_name\Administrator username and password.

Step 2: Install Softwares to Remote Access Zentyal PDC
Now that everything is correct and working is time to install the software needed to remote access Zentyal PDC Samba Server.
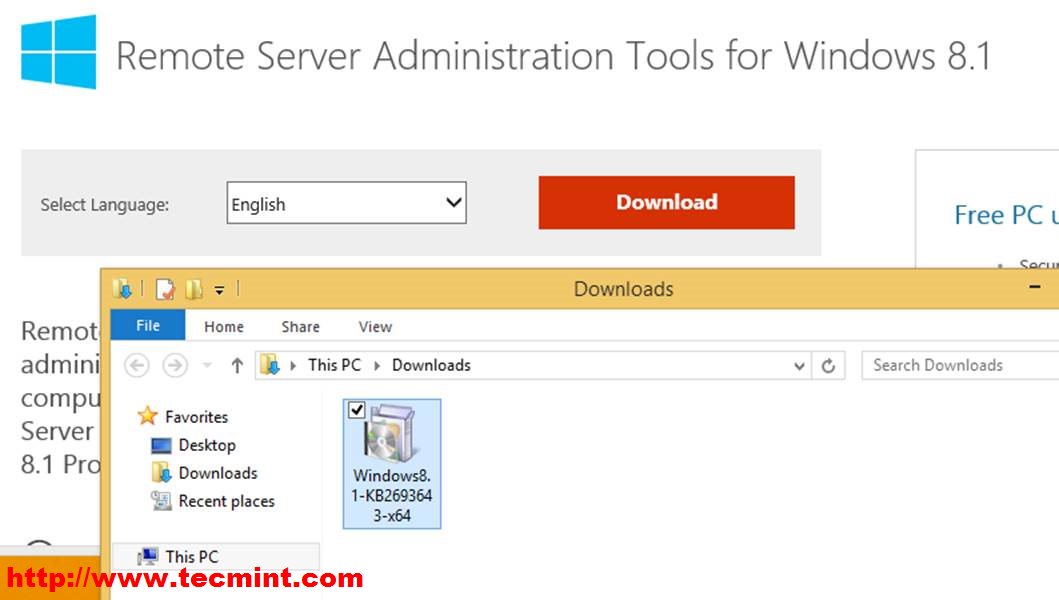
11. Open a browser and go to Remote Server Administration Tool for Windows 8.1 and download Windows flavour (x64 or x86) drivers, save it to your computer and run it.
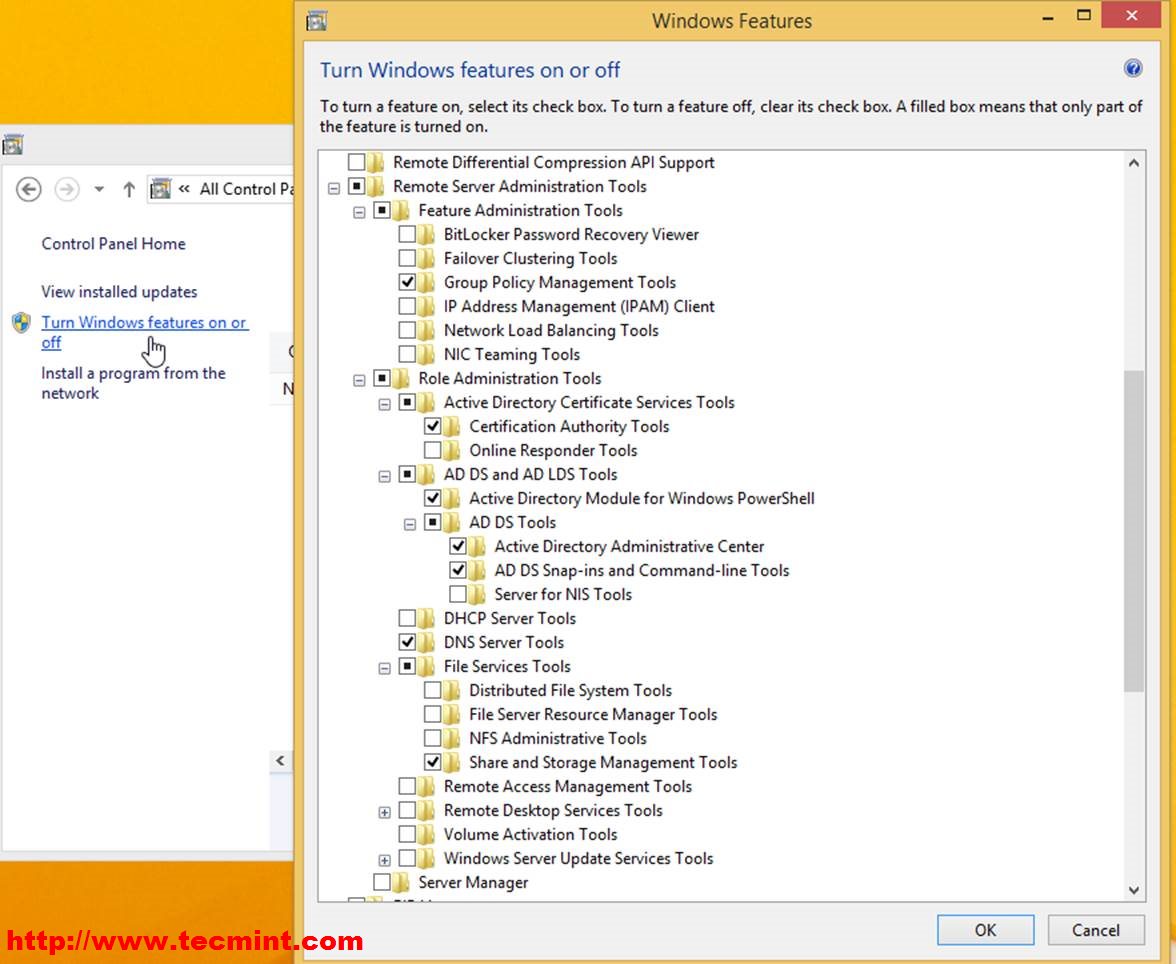
12. After this piece of software is installed reboot and then go to. This PC –> Uninstall orChange a Program –> Turn Windows features On or Off, then select the tools like in the image bellow.
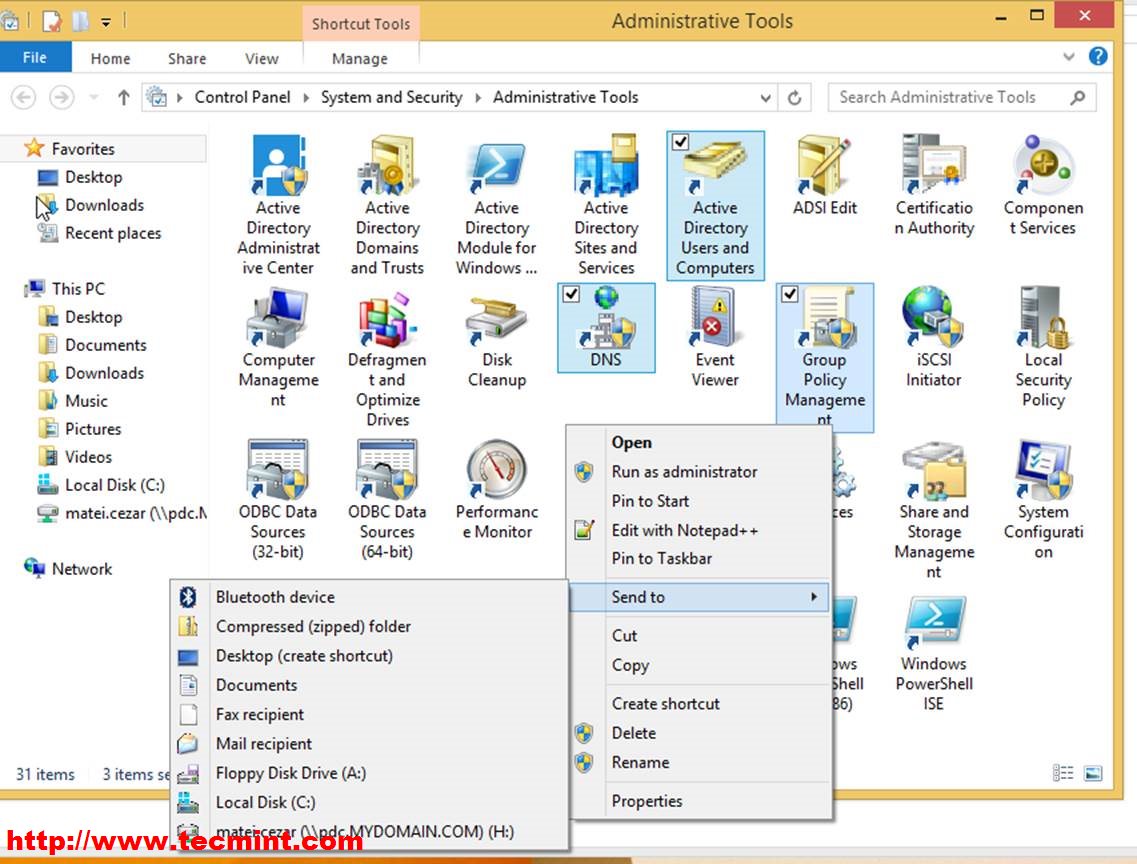
13. Reboot again then right click on Start –> Control Panel –> System and Security –> Administrative Tools and select Active Directory Users and Computers, Group Policy Management and DNS and Send all three as shortcut to Desktop.
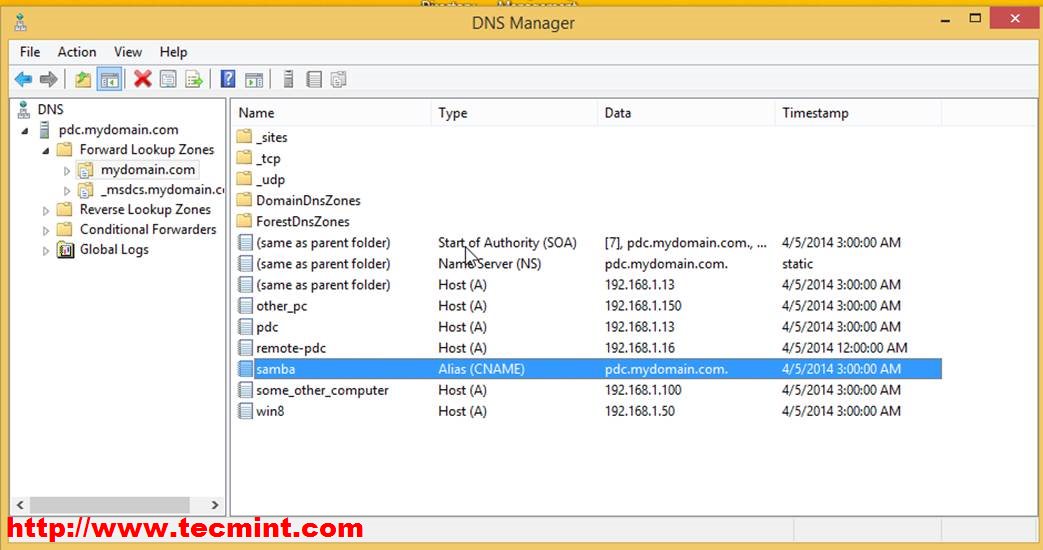
14. Now let’s try a remote connection to DNS server over Zentyal PDC and add a CNAME for zentyal. Open DNS and enter FQDN (fully qualified domain name) for Zentyal PDC server like in the screenshot below.

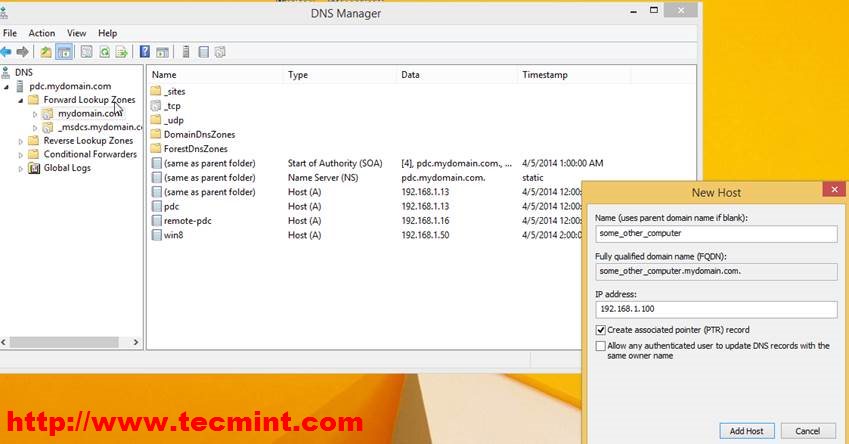
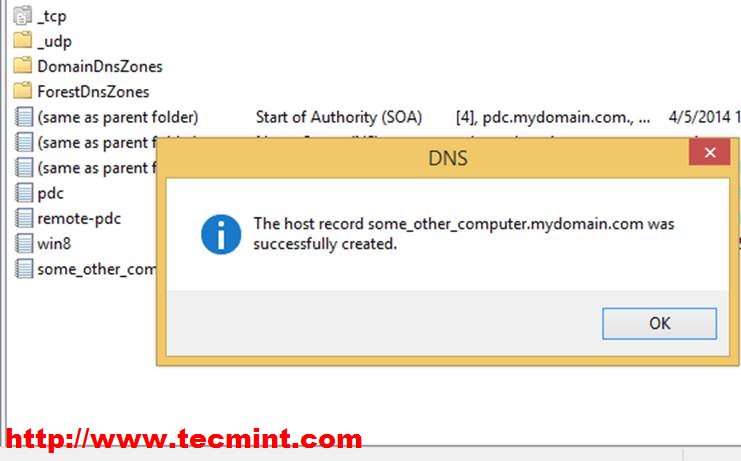
15. Go to your PDC FQDN, select your domain name and add New Host.
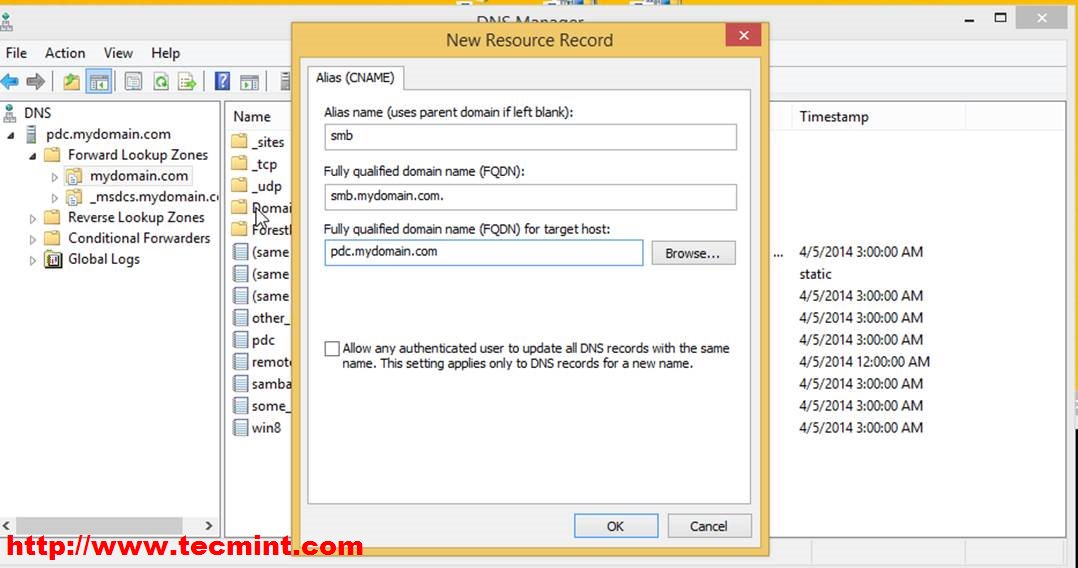
16. Go and add a new CNAME and then try ping your new alias.
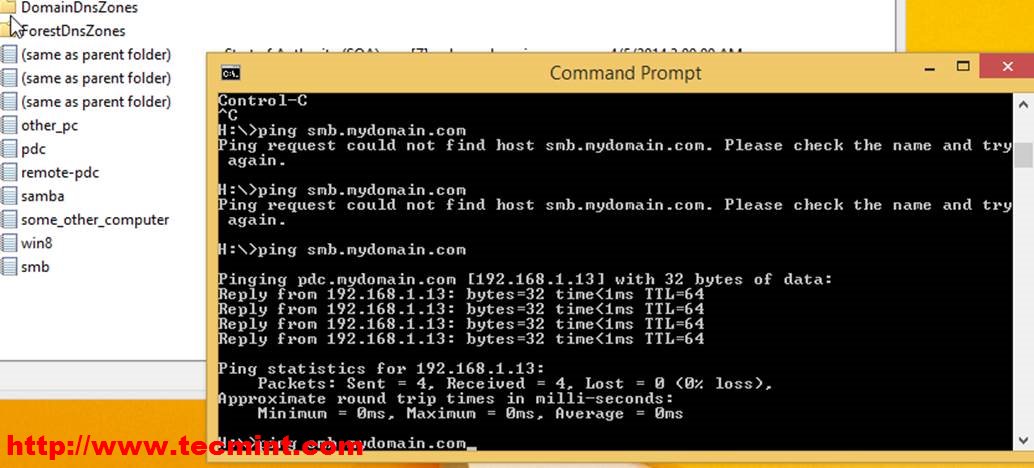
17. As you can see result the CNAME smb for pdc.mydomain.com has been successfully added to Zentyal Server and is completely functional.
Now open a browser and point your domain name address of PDC server address (https://mydomain.com or https://192.168.1.13 ) then go to DNS Module and add new forwarders ( I choose my default gateway and a Google Public DNS, you choose what better suits your needs).

18. Then add a new alias for your domain, this time added from Zentyal Web Interface. Click on Alias, Add New, enter alias name (CNAME) end then hit ADD.
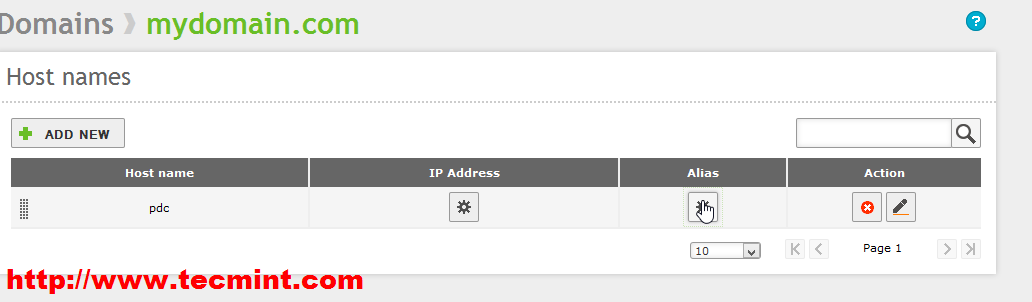

19. Hit on Save Changes for new setting to apply and go back to Windows 8.1 DNS and check if the record has been updated.
20. Zentyal DNS Server and DNS Remote Software are fully operational from both sides so we can now add as many records as we need in our DNS server.
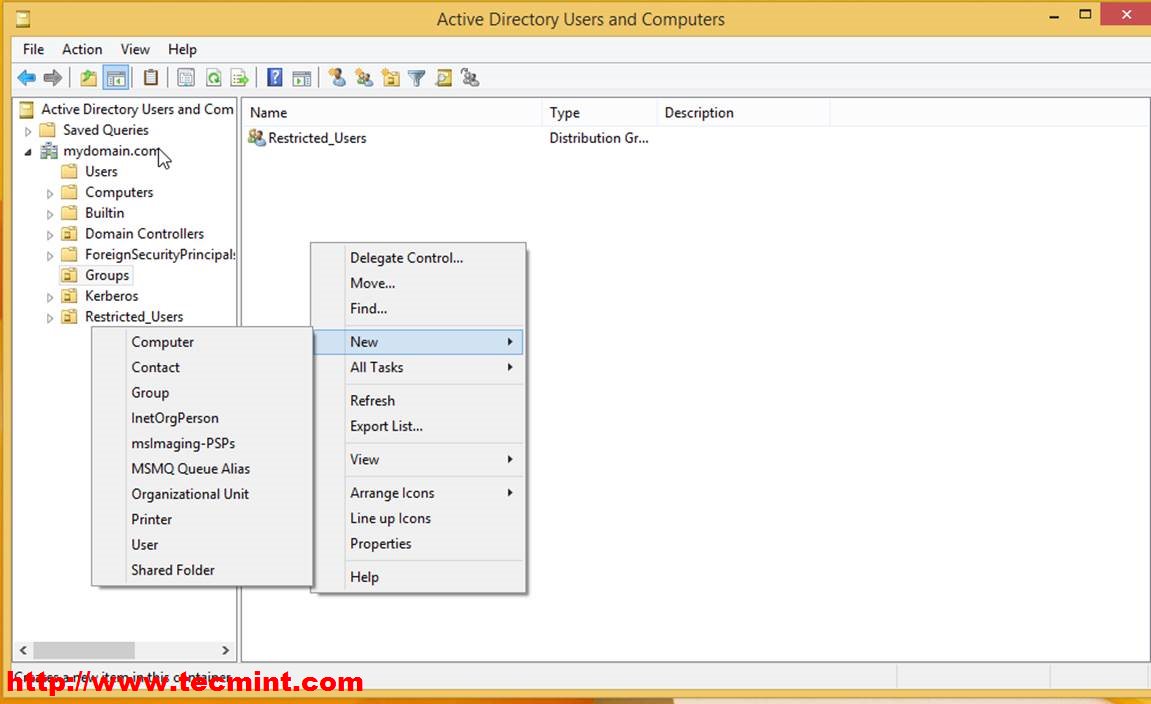
Now is time to play with Users and Groups, Open Active Directory Users and Computers, navigate to your domain name , select Groups and add a New Group.
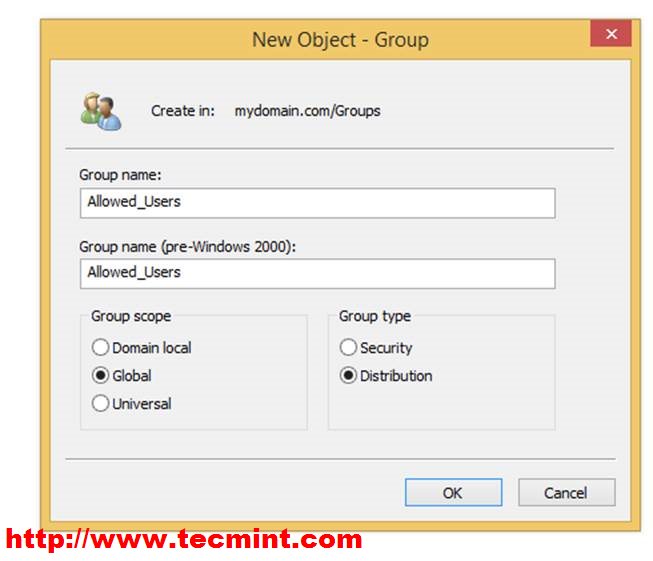
21. Enter your Group Name and select Distribution in Group Type ( selecting Security will allow Administrative rights and we don’t want this for our user) and Global in Group Scope and hit OK.
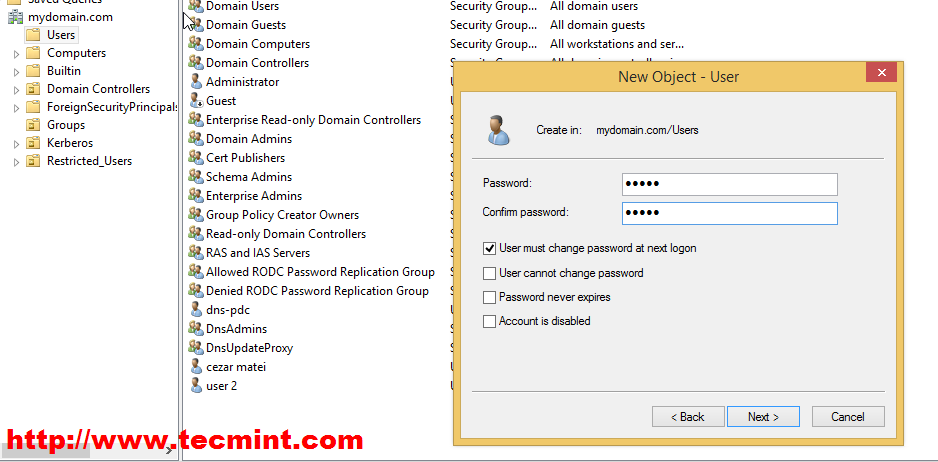
22. Then navigate to Users and Add a New User, complete the required fields, setup a password for this user – even force user to change password on next logon.

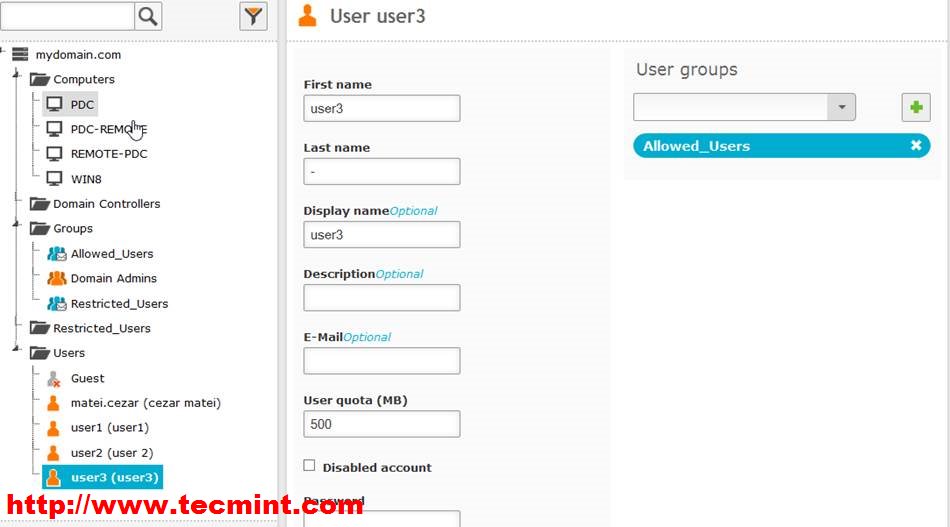
23. Now back to https://mydomain.com or https://192.168.1.13 and go to Users and Computers Module –> Manage. We can see that our user3 has been created on Zentyal PDC server and we can now integrate him into one of our Groups. Let’s say Allowed_Users Group.
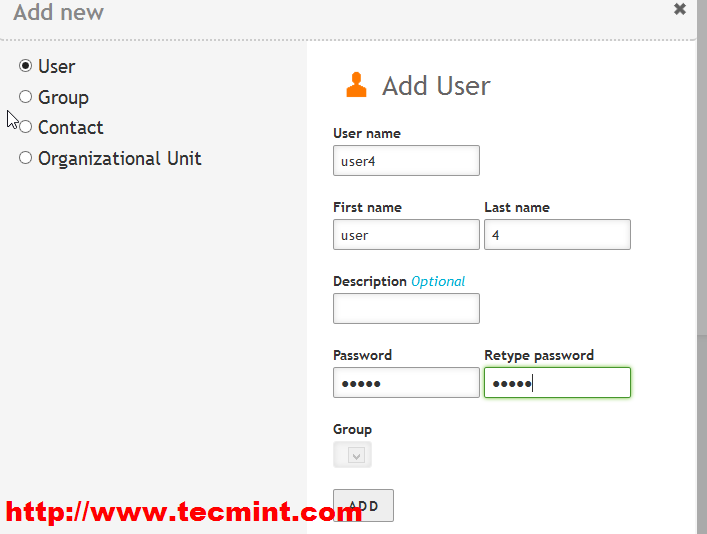
24. Now let’s try to add a New User from Zentyal Web Interface. Select Users, go to the green “+” button, select User again and enter your credentials for this new user.
25. After the user is created you can integrate him into a group (optional).

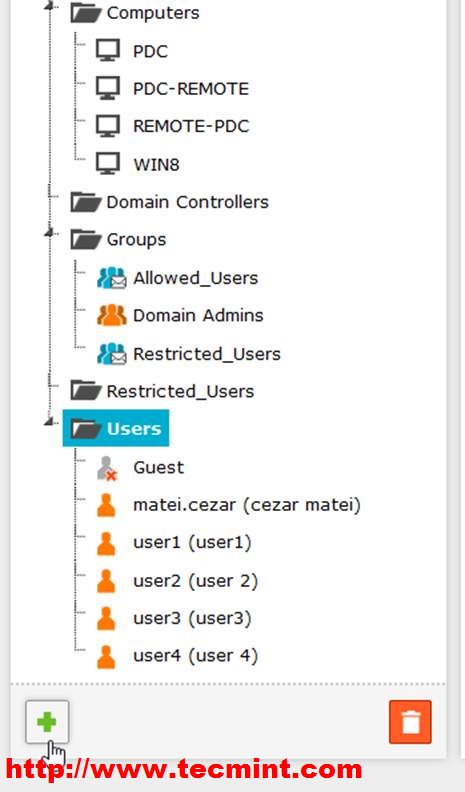
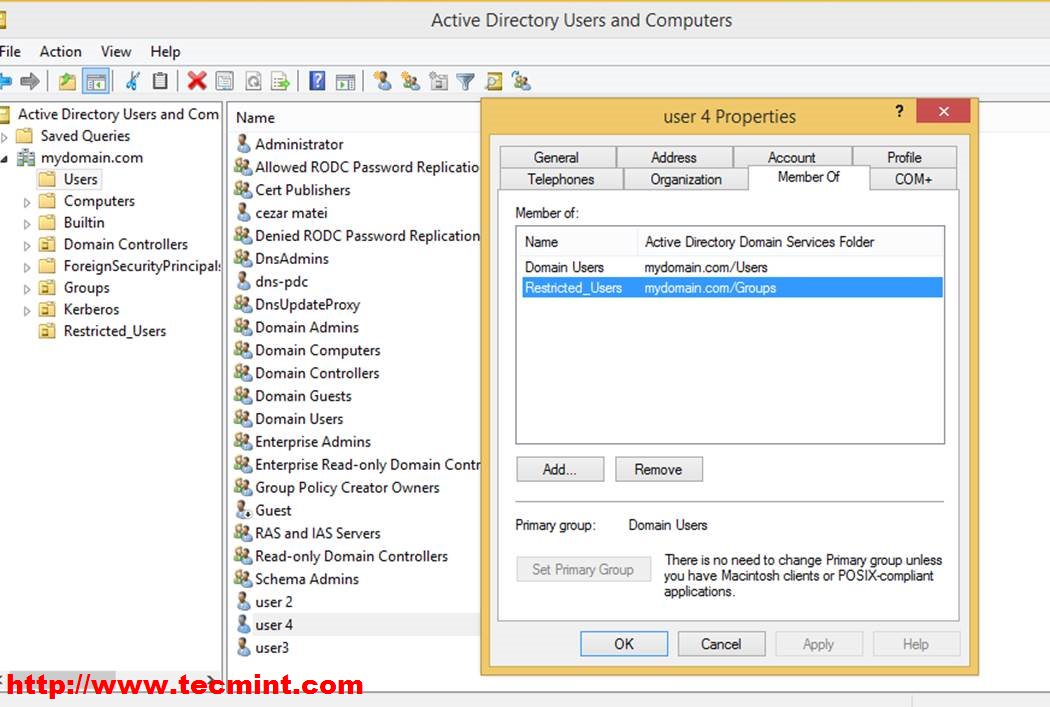
26. And now go back to Windows 8.1 Active Directory Users and Computers and verify if the new user4 is a member of Restricted_Users Group.
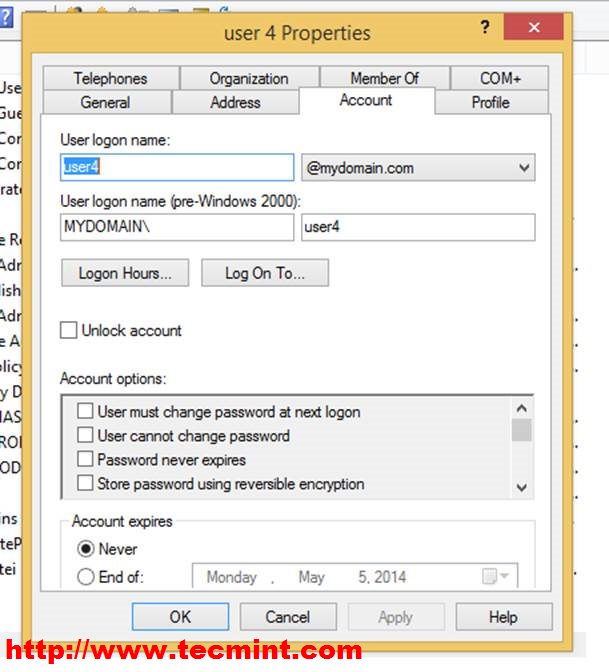
27. You also have a lot of tweaks for setting users like in a real Windows Server (change passwords on logon, enter telephone number, address, change profile path, etc ).
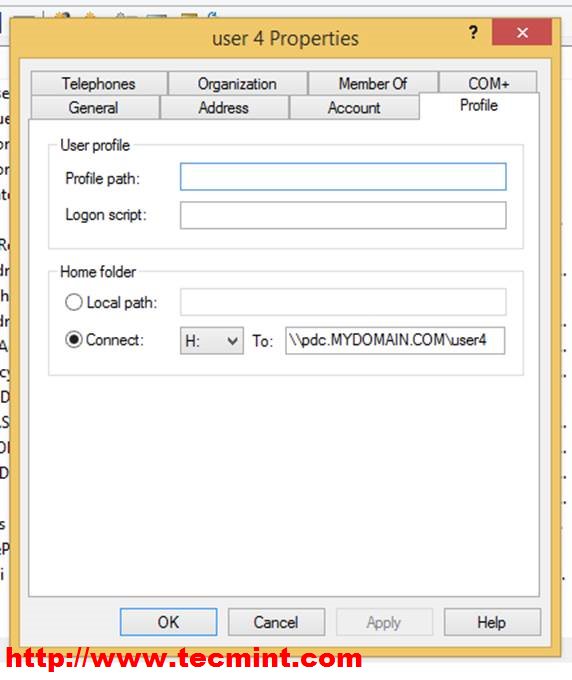
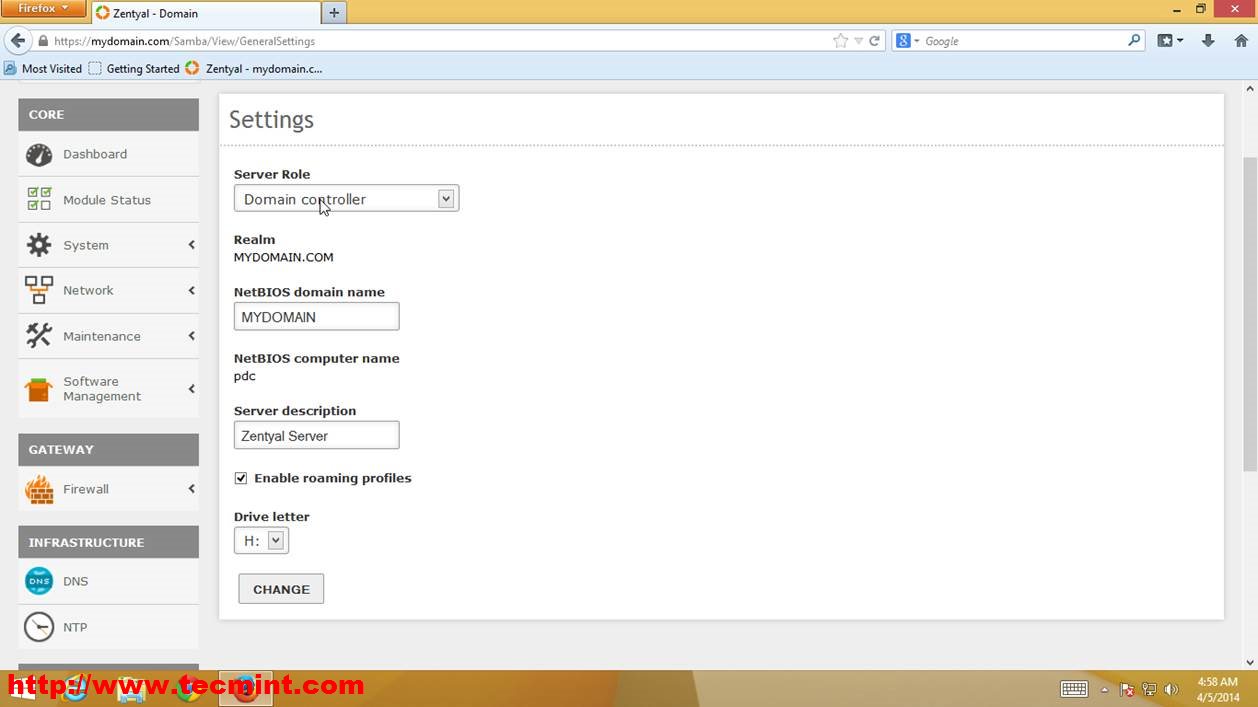
28. As the last configuration for this tutorial go to Domain Module on Zentyal Server and check “Enable roaming profiles” for your users to have access to documents and settings, have the same desktop experience to any computer they logon on your domain .
29. The server keeps roaming profiles under “/home/samba/profiles” path so you can navigate to this path for remote administration by using a command line program like Putty or WinSCP.
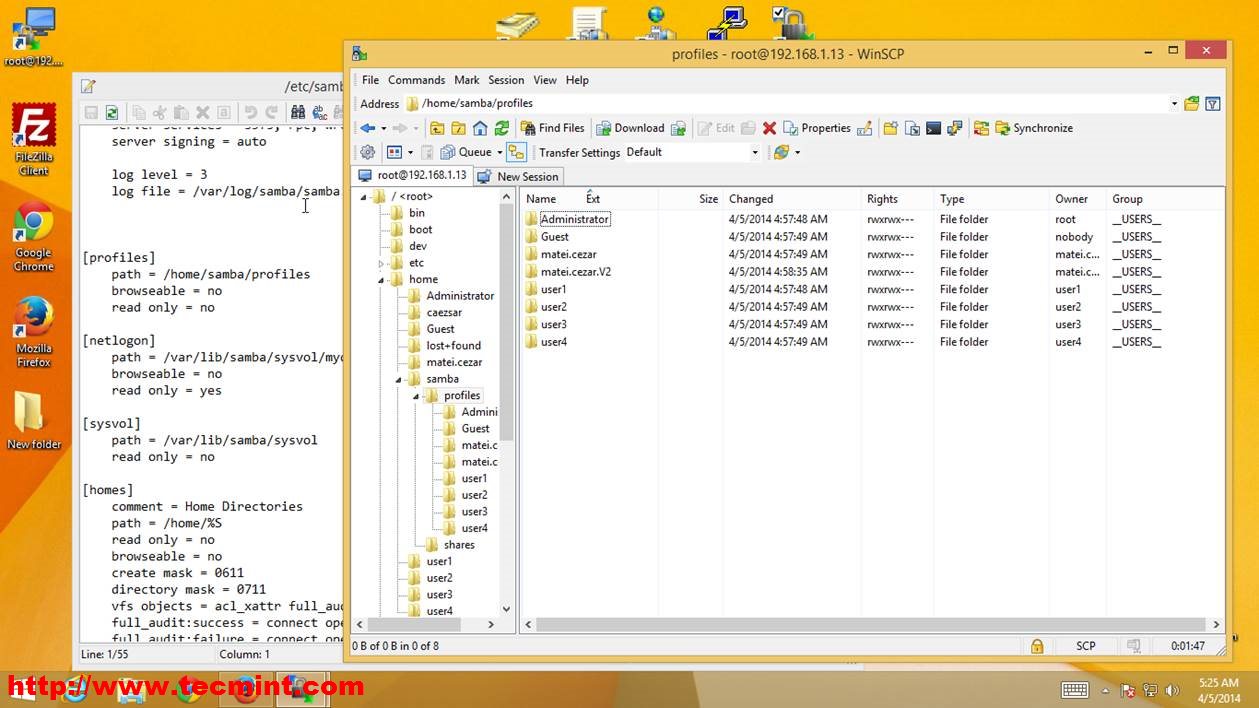
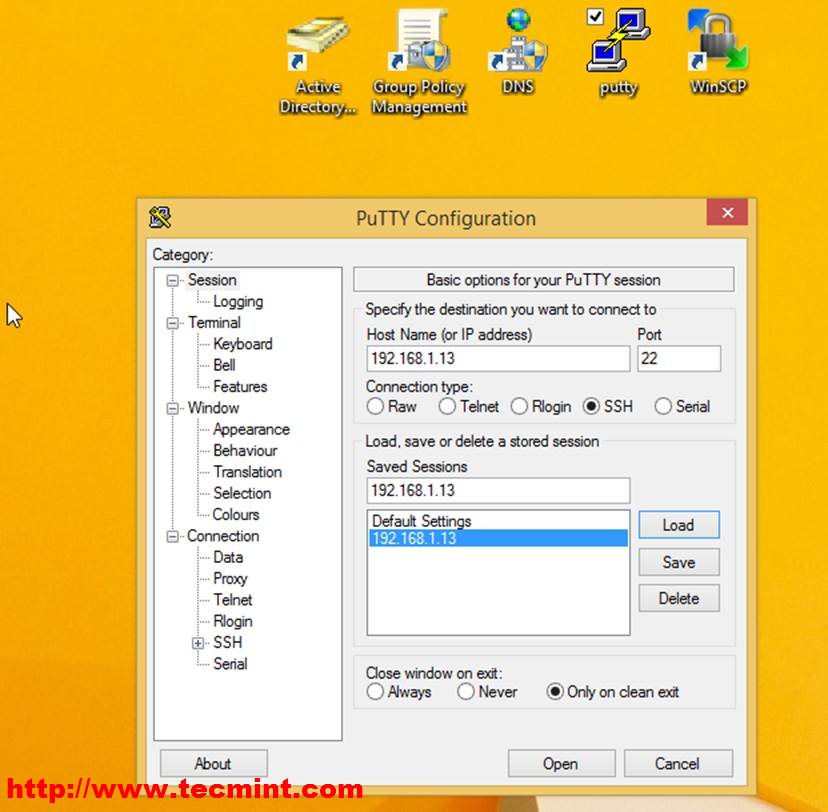
30. By default Zentyal 3.4 uses sudo for root privilege security. So if you want to enable root account on server download and install Putty on your Windows 8.1 system and connect through SSH using server’s IP address or domain name.
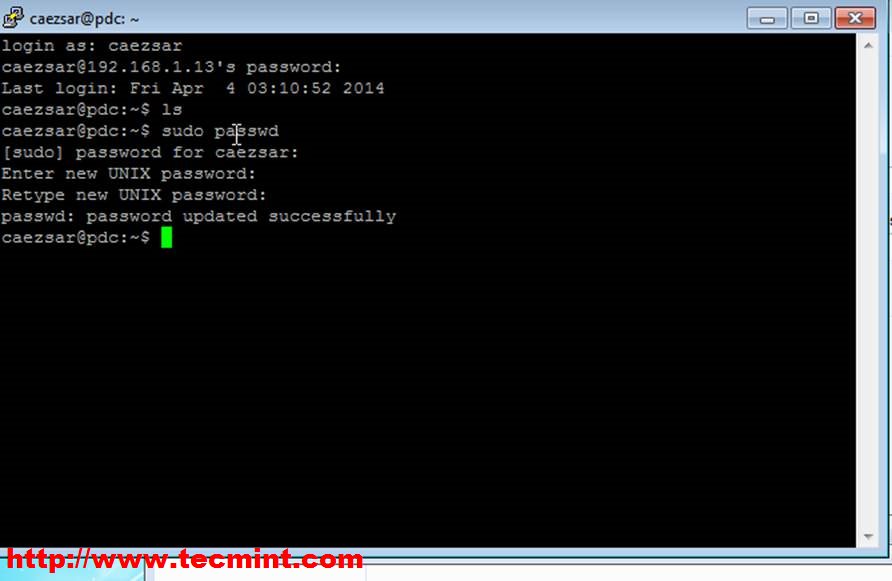
31. To enable root account connect through ssh with username and password created on system installation and then type next command “sudo passwd“, enter and confirm password (this will help you later for complete administrative tasks on a Graphical User Interface connecting through WinSCP.
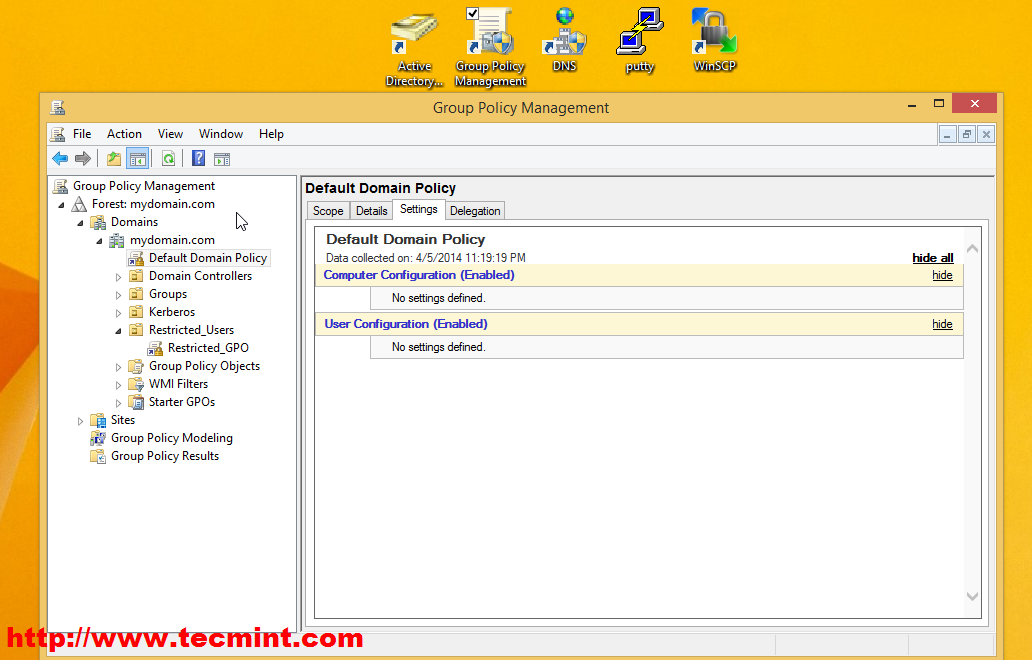
32. To setup Group Policy on Users and Computers just click on Group Policy Management shortcut that earlier was created on Desktop.
Now you have a full remote administrative access to your Zentyal PDC services: DNS, Active Directory, Users and Groups, Group Policy, Local system access through command line or GUI and a remote web access through https protocol from a Windows 8.1 based system
No comments:
Post a Comment